Description
**As of June 1st, 2025 back in stock 😉 **
Fits: ZX10, ZX11C, ZX11D, GPZ750r, GPZ900r, GPZ1000rx, GPZ1100, ZZR1100, ZZR1200, Concours, ZRX1100 & ZRX1200R, using Kawasaki Tensioner part #39170-1059. Check www.Kawasaki.com parts listings to check part number used on your Kawasaki 🙂
My new Tensioner Tamer™ fixes not only the symptom of the tensioner arm hitting the clutch, but also the actual problem of the lock plate slipping in the first place.
The starter/alternator chain tensioner performs two functions:
1. It tensions the chain when the motor is running and driving the alternator. In this regard, my unit performs exactly the same as the spring loaded OEM tensioner.
2. It tensions the chain when the starter operates.
This unit has an adjustable, permanently fixed stop. It does not move and it has zero clearance when installed. Expected normal wear allows less movement than the stock adjuster does when operating the starter. It won’t need adjustment. I include an extra one-use locknut for that purpose, but I have reports of guys and gals running my Tensioner Tamer™ for over 100,000 miles and they have never touched it. You “can” adjust it, but it is not necessary to do so.
Hy-Vo chains like to be kept taught when running. The stock spring loaded arm does this on my setup, just as it does with a stock tensioner.
Manual adjusters do not have any spring tension and the chain can run loose, or with inconsistent tension, when the motor is running. This is bad. I’ve worked on many of the early Honda and Kawasakis from the 70’s-80’s (the CB750F/900F/CBX for example) with Hy-Vo cam chains and manual cam chain adjusters. If you weren’t religious about readjusting the lock nut and letting the adjuster do it’s biz, the chains would wear out very rapidly.
My New Tensioner Tamer™ is made from a piece of CNC Machined billet 6061-T6 aluminum with a gun-drilled Stainless Allen button head bolt, Stainless lock nut, a 12.8 grade anchor bolt with an Aircraft Stainless Locknut and comes with your own tube of #262 Permanent Red LocTite.
Installation should take less than an hour.
Below is a video of my New Tensioner Tamer™ doing it’s thing to keep the chain effortlessly under control while the starter is being operated on my 12.5:1 compression ZRX1109:
James Compton JamesCompton.com
A tensioner NOT working correctly:
Another:
Another about to fail
Installation Supplies & Tools Needed:
-
The tools in your tool kit under the seat, or a reasonable facsimile thereof.
-
A really good inch/pound clicker torque wrench that goes down to 50 inch/pounds…OR…a Craftsmen Beam inch/pound torque wrench, they are about $25.00
-
A bottle of blue LocTite (Red comes with the Tensioner, but you’ll also need blue)
-
A couple smears of Silicone Sealant, any color.
-
A can of brake cleaner.
-
A Dremel with a bit to cut metal, like a Carborundum cutting wheel/disc.
-
The shop manual will be handy for those little details.
Clutch Carnage: Or, why you need a Tensioner Tamer
Installation Instructions:
First off, I assume you know how to wrench on a bike and that you can follow instructions. It is VERY important to install the Tensioner Tamer correctly, because if you do not, serious damage will result.
Keep a shop manual nearby. Consult it often. Be sure you have the tools above, and again, PLEASE follow my instructions and PLEASE call with any questions. Follow the directions to the T. Do not guess, ask.
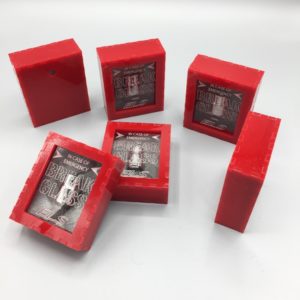
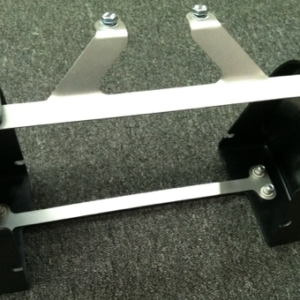
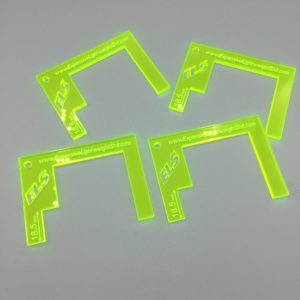
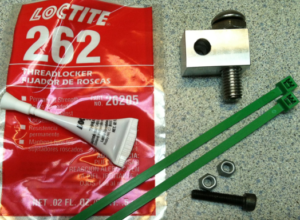
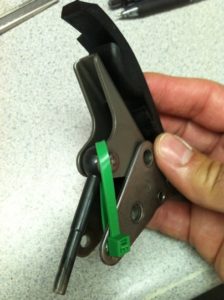
Tensioner Tamer Parts:
-
6061-T6 Aluminum block
-
Gun-Drilled Stainless 10mm Buttonhead Bolt & Locknut
-
Grade 12.8 5mm Allenhead Capscrew & Two all-metal one-use Locknuts
-
Tube of LocTite #262 Permanent Red Threadlock
-
Two GREEN Cableties
-
Not Shown: ExpensiveLightweightShit sticker 🙂
-
Place your bike on it’s sidestand, with the bike on sidestand you do not need to drain the oil.
-
Remove Clutch Cover, scrap gasket surfaces clean on crankcase and clutch cover.
-
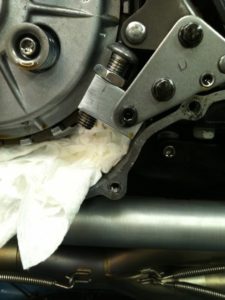
Insert towel in the cavity per picture so nothing gets lost in the motor.
-
-
Remove Starter/Alternator Tensioner by removing the two 8mm hex bolts. Be careful, it’s spring loaded and it’s easy to pinch a finger 🙂
-
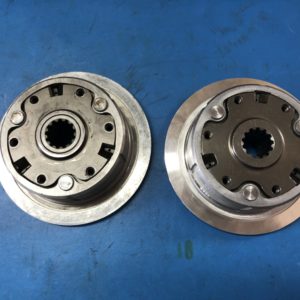
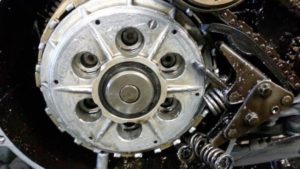
Inspect the tensioner pad. It should have a even dark grey Teflon coating. If any black shows through, it’s time to replace it.
-

-
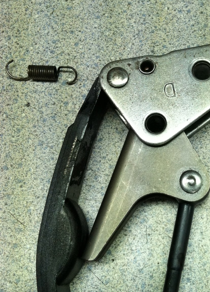
Remove spring from lock tab.
-
-
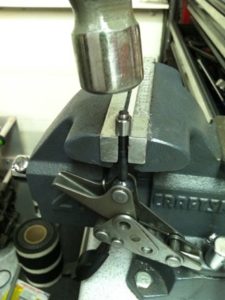
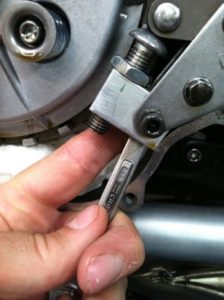
If a Tensioner Fix has been previously installed, it needs to be removed. A vise, hammer and punch, or a pair of ViseGrips loosley around the top and a hammer tap will remove it. If it’s an early maladezo Fix, it may need to be slotted with the Dremel to remove. Be careful, do not nick shaft.
-
-
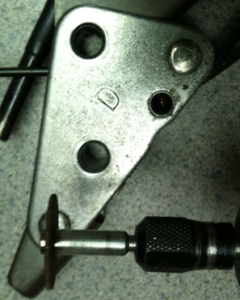
The lower rivet needs the head ground off with the Dremel. Be careful and do not cut into the metal frame. If you stop just short of cutting all the way thru, you can tap it out with a punch and a deep socket.
-
-
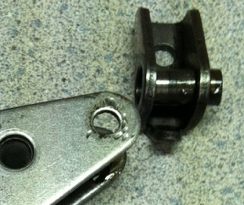
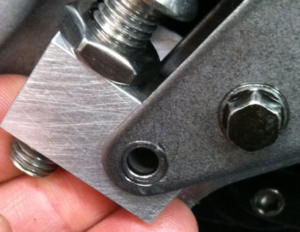
You will need to reuse the spacer inside the lock tab, it pushes out with your finger very easily.
-
-
Clean tensioner with a towel and some brake cleaner. It’s important to get all the oil off so the LocTite grips well on the clean surface when you get to that stage. OIl all over is not good until the install is done.
-
Wrap cable tie around tensioner per the picture, apply blue LocTite (NOT Red!) to the two 8mm hex bolts and reinstall tensioner, torque to 87 Inch/Pounds, cut cable tie and remove pieces.
-
-
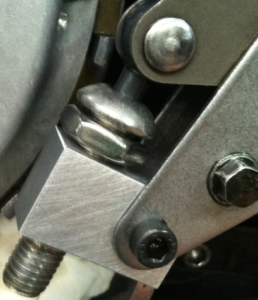
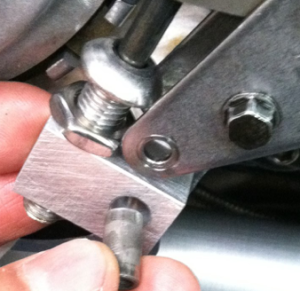
With the 10mm Allen and locknut screwed all the way into the block…See second picture below :-)…Slip the lock tab spacer into the Tensioner Tamer, Slide Tensioner Rod into the Gun-Drilled buttom head bolt, insert black 5mm Allen bolt into the tensioner frame and spacer. Do not install the 5mm lock nut at this time, this is preassembly.
-

-
-
Turn the Gun-Drilled bolt “out” with your fingers, turn it as tight as you can with just your fingers till it is positioned against the “ball” of the tensioner rod. Hold, and turn the locknut with your fingers till it is finger-tight against the aluminum block.
-
-
Remove the black Allen bolt, don’t lose the spacer.
-
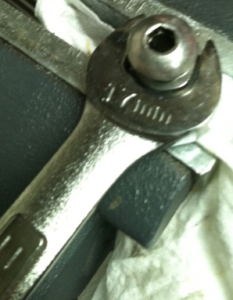
Place aluminum in a vise, or holt with a 14mm wrench or Crescent wrenck. Tighten the 17mm locknut to approximately 15 foot/pounds. “Pretty Tight”, like you would tighten an 8mm handlebar clamp bolt on a ZRX.
-
-
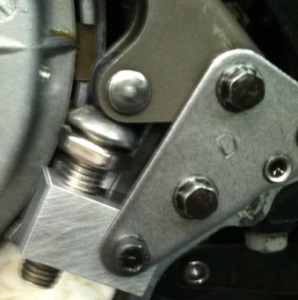
Reinstall assembly and spacer. Insert black Allen bolt.
-
-
Have torque wrench pre-set to 75 inch/pounds.
-
Be sure the bolt, spacer, nut and all are VERY clean, with zero oil on them. Brake cleaner is your friend in this case! This is important to create a great bond with the LocTite.
-
SHAKE tube of 262 LocTite for at least 3 minutes. This is very important.
-
Open tube, apply liberally to One-Use locknut.
-
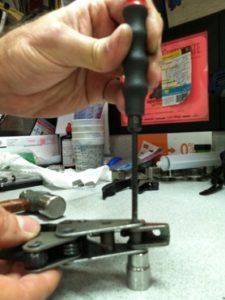
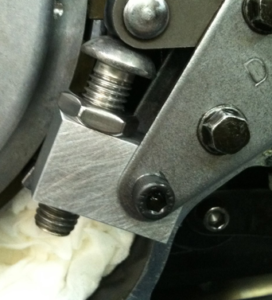
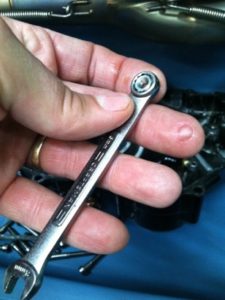
Insert into 8mm box-end wrench per the picture, the wrench is being used backwards to allow you to get it behind the tensioner.
-
-
Install onto black Allen bolt, tighten with 4mm Allen wrench. Immediately Torque to 75 inch/pounds…do not wait as the LocTite starts to cure immediately and it needs to be tight before the hardening starts.
-
REMOVE TOWEL FROM CRANKCASE!!
-
Apply smear of silicone to the front and rear crankcase joints.
-
Install gasket and clutch cover. The front four screws should have a light coat of blue LocTite to prevent leakage. Tighten clutch cover bolts to 87 inch/pounds.
-
Keep the extra One-Use Nut for possible future use.
Pete Aronson, aka KWICK
315 West Elliot Road
Suites 107-487
Tempe, AZ 85284
602-397-4869
WARNING: ELS Products MAY CONTAIN, or be Made With, Patented Parts, Tools, Components and/or Apparati. Manufacturing Facility DOES Contain Nuts.